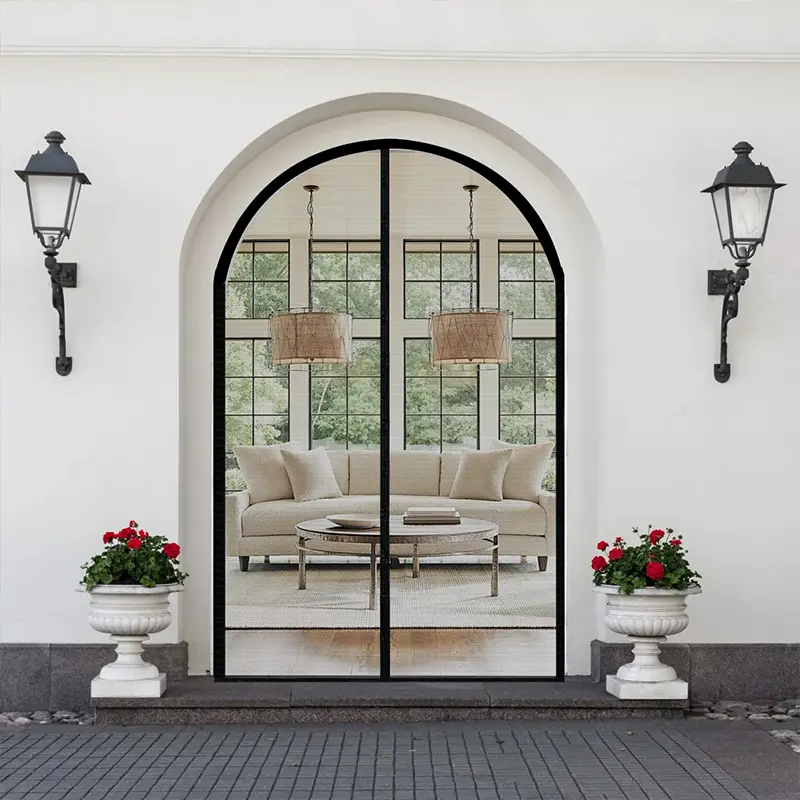

Custom Arched Magnetic Fly Screen Door
Tailor-Made for Curved Doorways | Heavy Duty fibreglass, Hands-Free Magnetic Closure, Tool-Free Install Product Highlights : Perfect Fit for Arched Entrances Don't compromise your home’s elegance with rectangular fly screens. The ZOORMESH Arched Series is precision-engineered to follow the specific radius of your curved doorway. Each fly screen is individually cut to your measurements , ensuring a seamless, gap-free seal that standard products can't achieve. Precision Geometric Tailoring We manufacture based on your specific arch dimensions (Width, centre Height, and Side Height). This bespoke approach ensures the mesh contours accurately to your unique architectural frame, maintaining both beauty and functionality. Industrial-Grade & UV-Resistant Mesh Built with heavy-duty, PVC-coated fibreglass . This fire-retardant material is designed to hold its shape along curved edges without fraying or sagging. Enjoy high-transparency visibility and maximum airflow while keeping pests out. Seamless Hands-Free Closure Despite the curved top, the centre opening uses 15cm high-energy magnet strips sewn along the seam in segments . It allows for effortless entry and exit, snapping shut instantly and silently behind you—perfect for pets, kids, and busy hands. Flexible Tool-Free Installation Includes a 1-inch wide, flexible full-frame Velcro system that adapts perfectly to the curve of your frame. It mounts securely to wood, metal, or vinyl without drilling. Care: Simply wipe with a damp cloth or hand wash. (Note: Not suitable for machine washing). How to Measure for Arched Doors To ensure a flawless fit, arched doors require three critical measurements : Total Width: The widest point of the frame. Total centre Height: From the bottom to the highest point of the arch. Side Height: From the bottom to the point where the arch begins to curve. 🎯 Pro Installation Tip: For arches, a clean surface is essential. Ensure the curved frame has at least a 1-inch (2.5cm) flat surface for the Velcro to bond effectively. When installing, start from the top centre and work your way down the curves for the best tension.